
- to create a reliable hand position, in which all fingers can drop on the string with comfort and consistencyand
- to overcome challenges of the stretch in first (and half) position, where the half steps are furthest apart.
Please keep in mind that left hand frame is NOT a “one-size-fits-all” model; these are general guidelines. All of us have different ranges of motion, hand proportions, and hand sizes. If you’re taking private lessons, please consult with your teacher.
If you’re a visual learner and prefer to see a video version of this, just scroll past the text below to see a demonstration.
1) Alignment
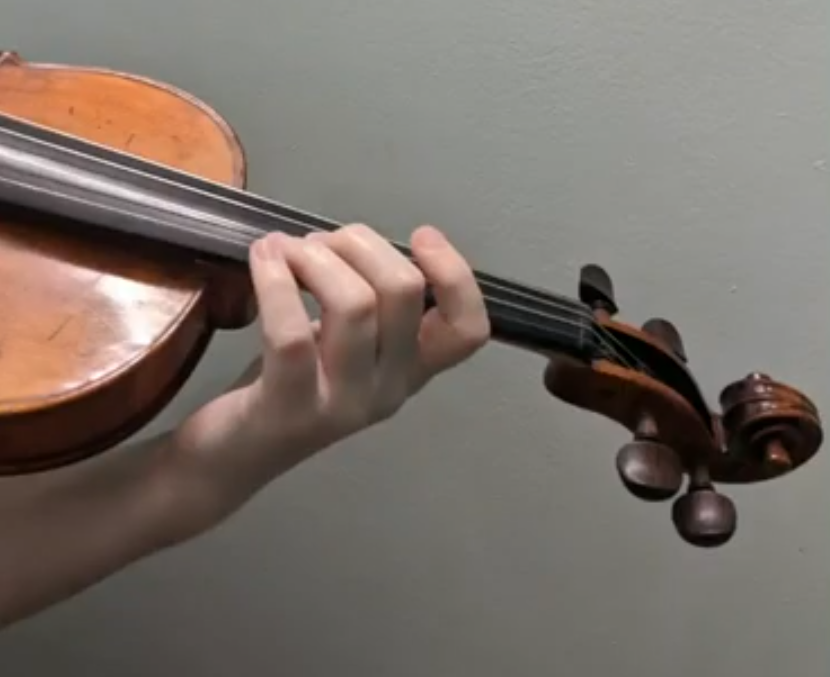
Start with the basics: With the instrument up, create a straight line from the left elbow to the knuckle joint of the pinky. Keep the fingers relaxed and curved at all times; keep the wrist straight/neutral. Turn the palm slightly to the left; this will allow all 4 fingers to be above the strings. Move the elbow a little to the right to reach lower strings (and to the left for upper strings). Only adjust the elbow as much as needed to maintain the proper alignment with the pinky side of the hand. Tap your string of choice with each of the 4 fingers to ensure that the motion is coming from the base knuckle.
2) Weight Distribution
The most common issue with left hand frame is catering too much to the 1st finger, in which the 3rd and 4th fingers don’t feel supported. This is especially problematic in players with smaller hands or short pinkies. We can correct this by transferring the weight toward the middle of the hand. To do this:
- Start by placing the 3rd finger down alone in first position. Keep the finger curved and find a comfortable position for the hand that you can hold for a long time.
- Place the 2nd finger right behind 3rd (a half step behind).
- Now, find the 4th finger placement in a curved position. Keep the 3rd finger down, as this is our “anchor” finger for the frame that will support the pinky.
- Finally, reach back with the 1st finger.
3) Thumb Position
The thumb position varies from one hand to another. Some players with larger hands place it across from the 1st finger because they can still reach with 4th finger comfortably. The most common placement is somewhere between 1st and 2nd fingers; however, for some small hands it works great to place the thumb across the 2nd finger because this helps to keep the weight distribution in the middle of the hand. Also, for smaller hands, it’s helpful to place the pad of the thumb lower, almost under the neck of the instrument. This will create more space and comfort between the thumb and the index finger. It will also allow the other fingers to come around the neck easier.
4) More comfort for the pinky
If the pinky is struggling to reach, bring that side of the hand closer to the neck of the instrument. Do this by sinking the knuckle in. Bringing the palm closer will allow for the pinky to be more curved, relaxed, and consistent. It will help also with proper weight distribution, in which the lower fingers will reach back. On the contrary, a flat pinky usually results in a lot of tension, and can potentially cause injury.
Bringing the palm closer while maintaining a straight wrist alignment can be very tricky at first. Simon Fischer has some great exercises for this in his books Warming Up and Basics.


5) Contact with base of index finger
The contact between the base of the 1st finger and the right side of the neck will slightly change, depending which string is being played. This depends a lot on the anatomy of the hand (beyond generic size), and is very individual. For certain hands it’s better to make the contact closer to the base knuckles while for others it’s better to put the hand lower. To reach lower strings, the fingers will want to come up higher.
Very important!
- Be careful that the fingers don’t “fall forward” on the fingerboard. Usually when this happens, the finger comes too much from above, starts to curve inward, and the nail starts to make contact with the fingerboard. This must be avoided, as it creates poor technique.
- No matter how high or low your first finger needs to be, the goal is the same for everyone: The fingers must always lift and drop from the base knuckles, and the finger shape should remain more or less the same during the lifting and dropping.
Once you create a nice left hand setup, it’s time for Schradeick’s 1st exercise from his School of Violin Technics.

Disclaimer: Article contains affiliate links.